Starting My Game Over (Not Really)

Devblog #8

All right! Second post tonight! (It’s 1am now. What even is sleep??)

I haven’t worked on my game much since Devblog #7. I even somehow convinced myself that I wrote that blog post a year ago. It’s only been 4 months! That’s just weird. The reason I stopped developing the game was because of my work schedule. We had a huge auction at the end of April that resulted in a pile of work that I was not expecting. I did 302 hours in 32 days which is nearly double a full time job. Bless Becky for putting up with that.

I have a new manager in charge of whipping me when I slack too. And by that I mean Kelly at Edmonton Nerd List asks me regularly for updates and doesn’t take no guff. If you’re local and haven’t heard of Edmonton Nerd List you HAVE to check out the website. if you’re looking for comics or video games or D&D or pretty much any like-minded people around the city then his website is the place to start.

Honestly I could write a whole post on just the positive impact that Nerd List and Kelly has had on my ability to network around the city. BUT I WON’T! (I’ll do it another day).

Right. Ok. Game stuff.

I’m. Starting. Over.

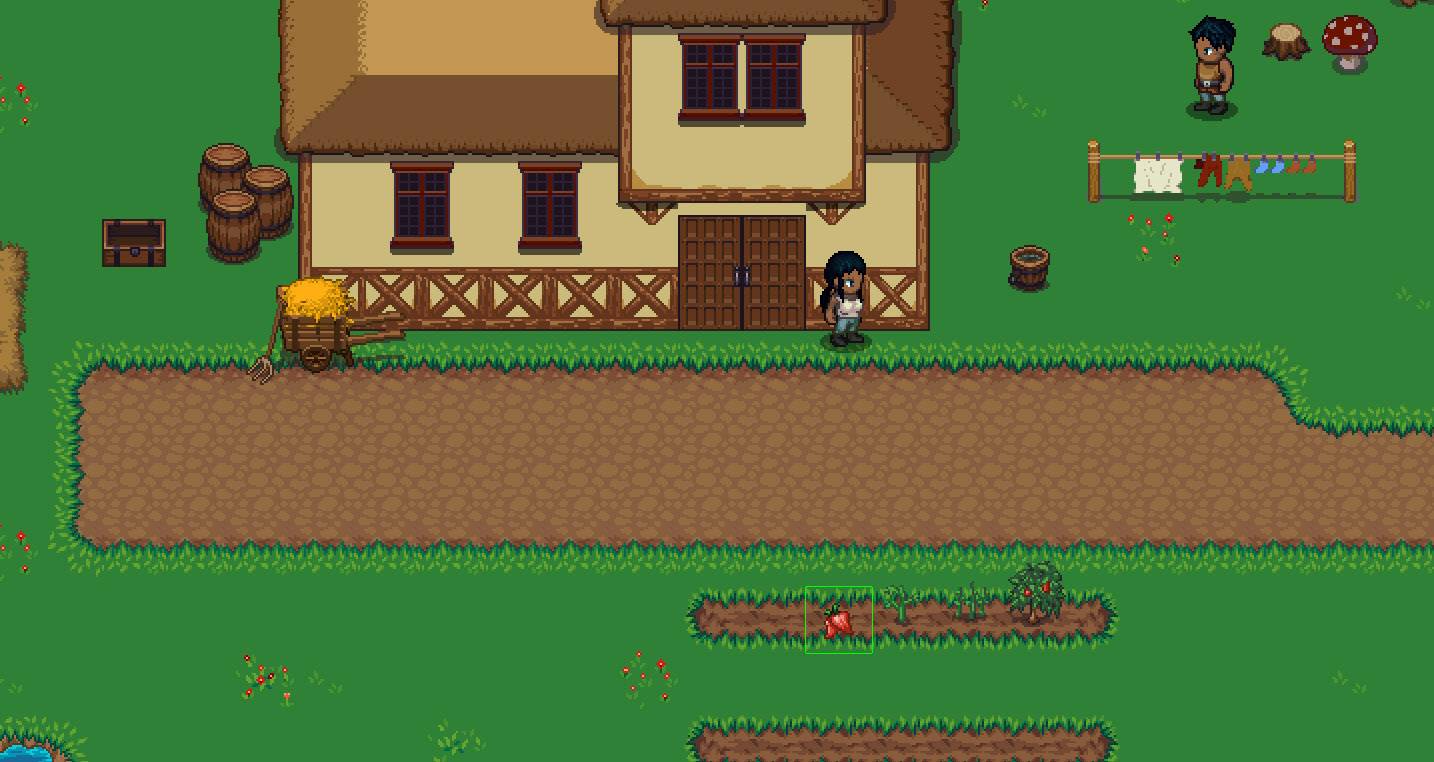
I know I know. Groans all around. I’m not ‘really’ starting over. See most of the game has only ever been on paper. Not just notes and brainstorms either. Spreadsheets and object classes and real technical stuff. It’s always fun when making a game to immediately make a level and show your character jumping around but it’s not the most efficient at all. Figure out the foundation of your game with ugly placeholder art first and fix everything while it’s still easy to fix! Well that’s what I did. You saw the million posts about perspective where I finally decided on this:

Isometric Oblique Wall Test
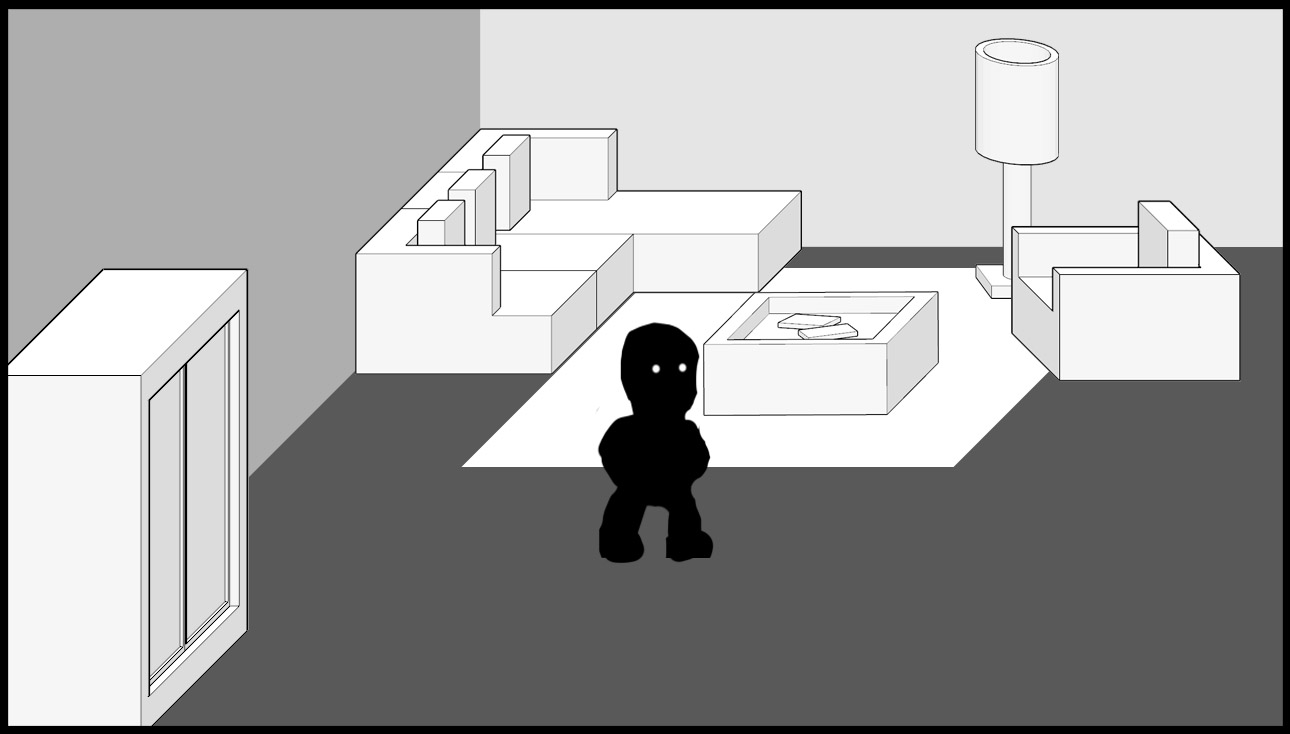
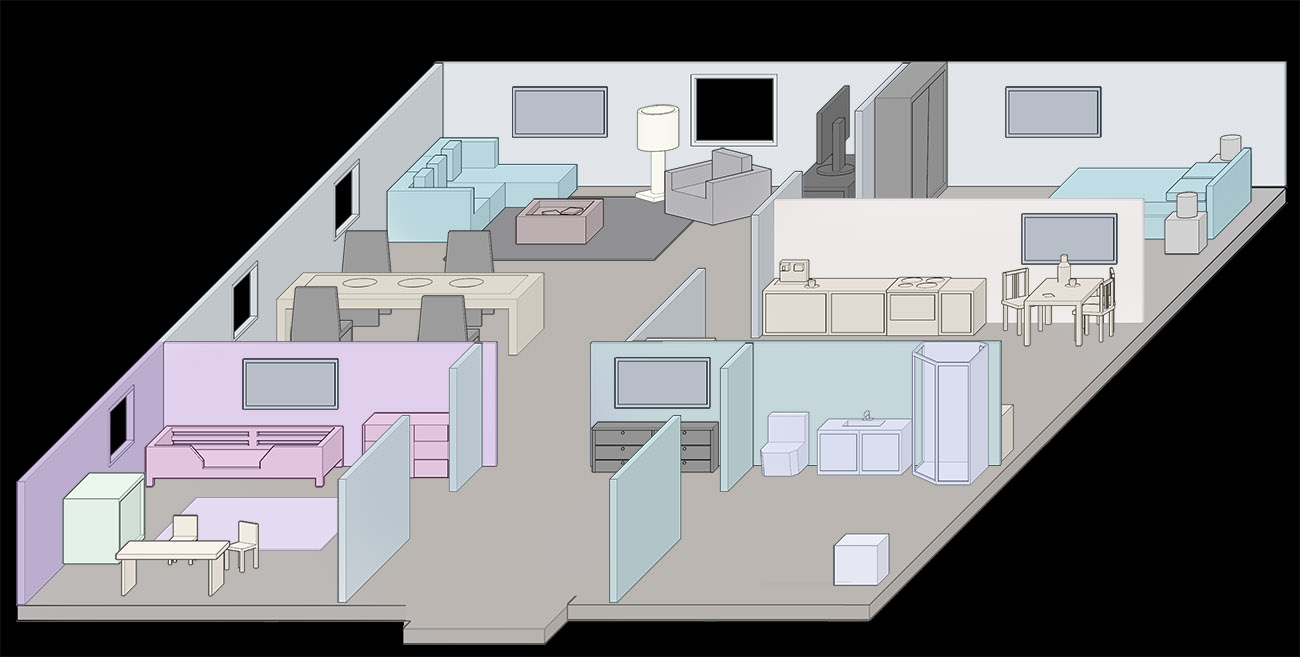
Oblique with 100% scaled front side and 35% scaled right side. Seeing the whole scene out like this doesn’t really show what the game looks like but zoomed in it’s more like this:

Oblique Wall TestWhich is… fine. I guess. But I hated that you can never really see a room properly. You will always have invisible walls to the right and see that black of space as you walk towards the bed. But I couldn’t do a one-point perspective because of all the reasons I said in the earlier posts.

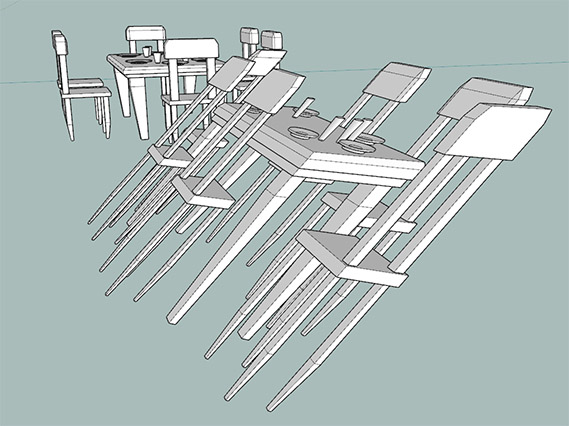
But then I wondered “What if I combined two opposite perspective projections in one room?!”

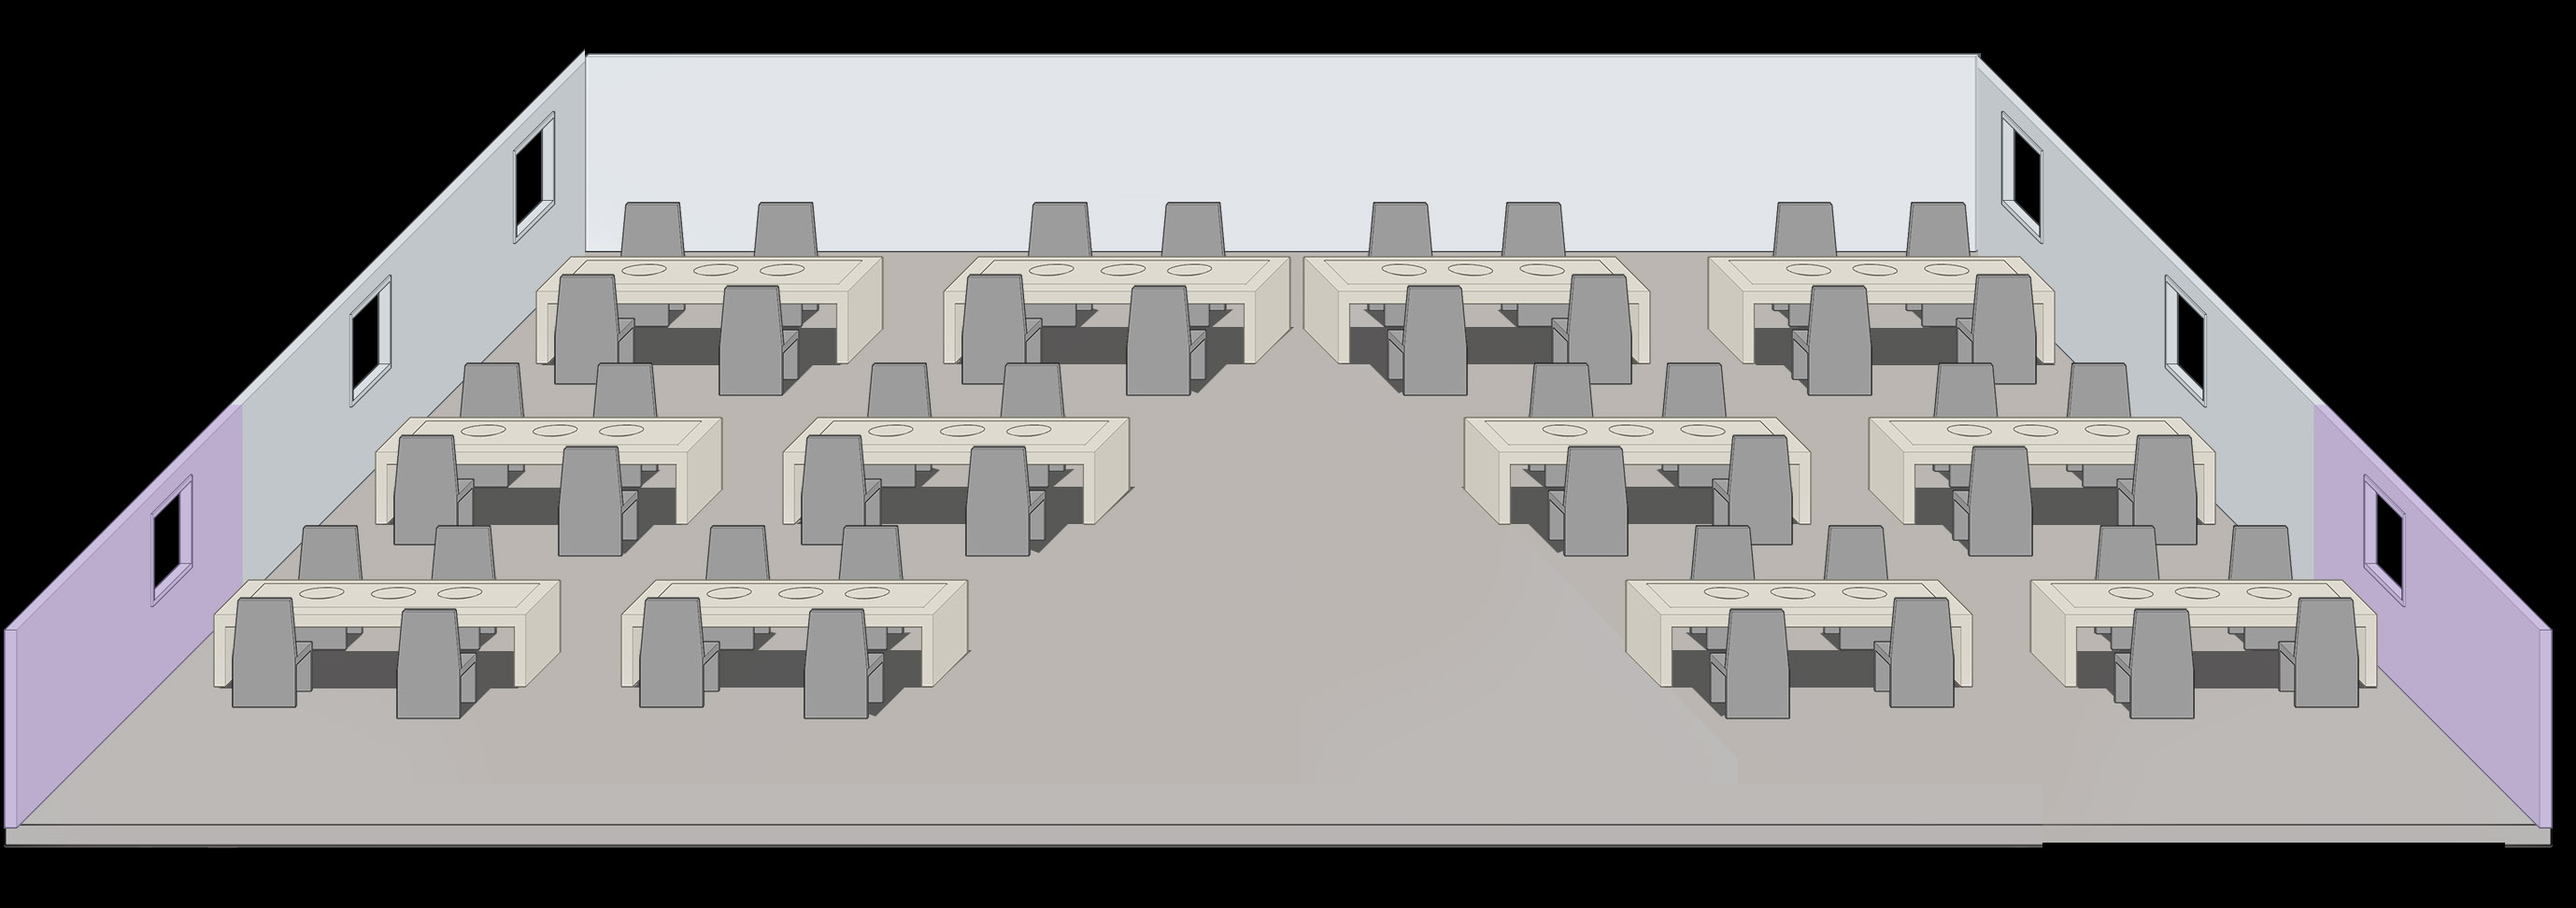
Nope. Not yet. I reversed the left side and added it to the right to hopefully make a cafeteria. But I ended up with a huge empty triangle of floor there in the middle even though all these tables are ‘supposed’ to be lined up in rows.

So then I made a table in the middle that was both projections in one and zoomed in to show close to what it would look like in game:

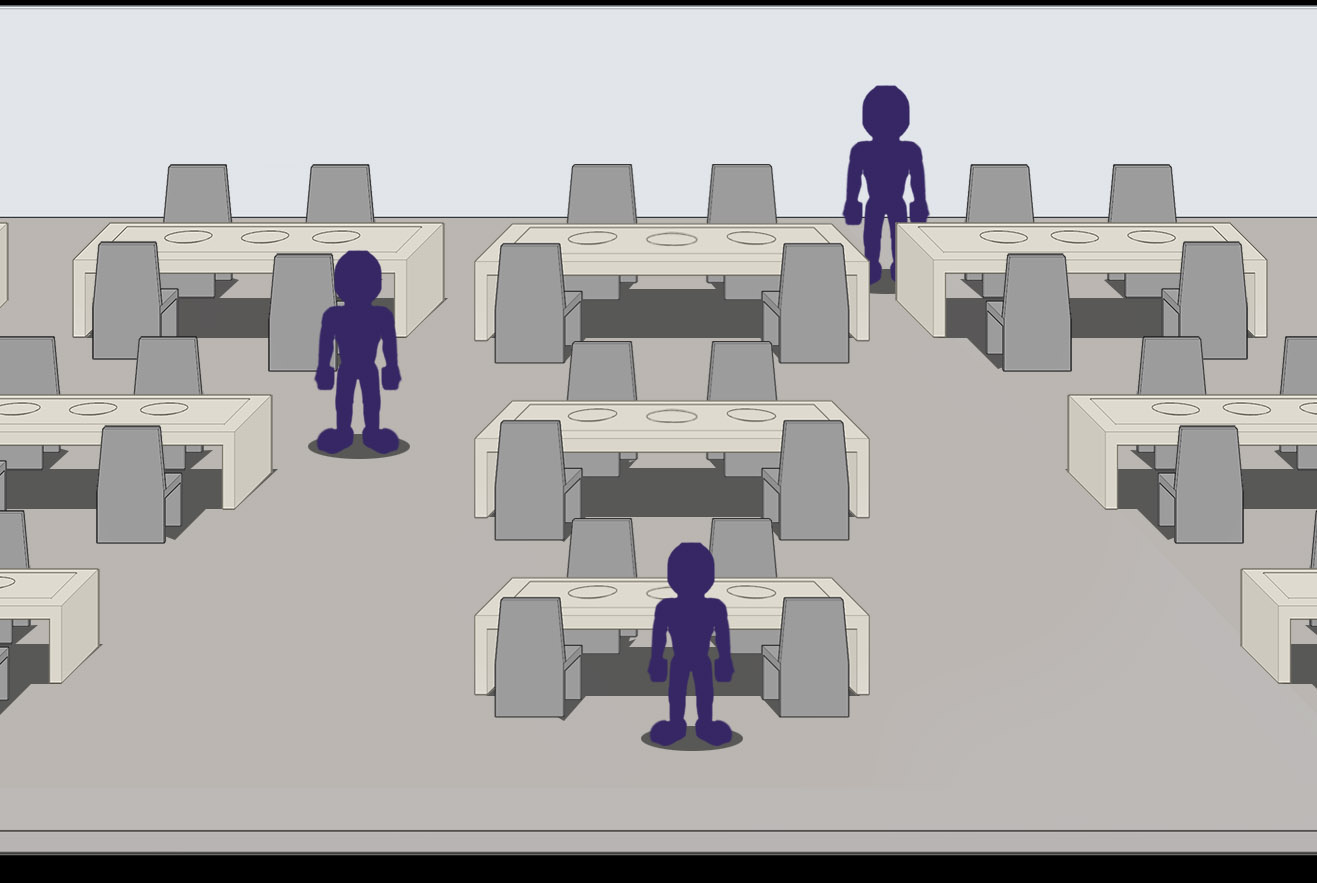
Hey! That ‘almost’ works. It’s not perfect by a long shot but it’s already better. So I tried it in a different room with less uniform furniture. A kitchen:

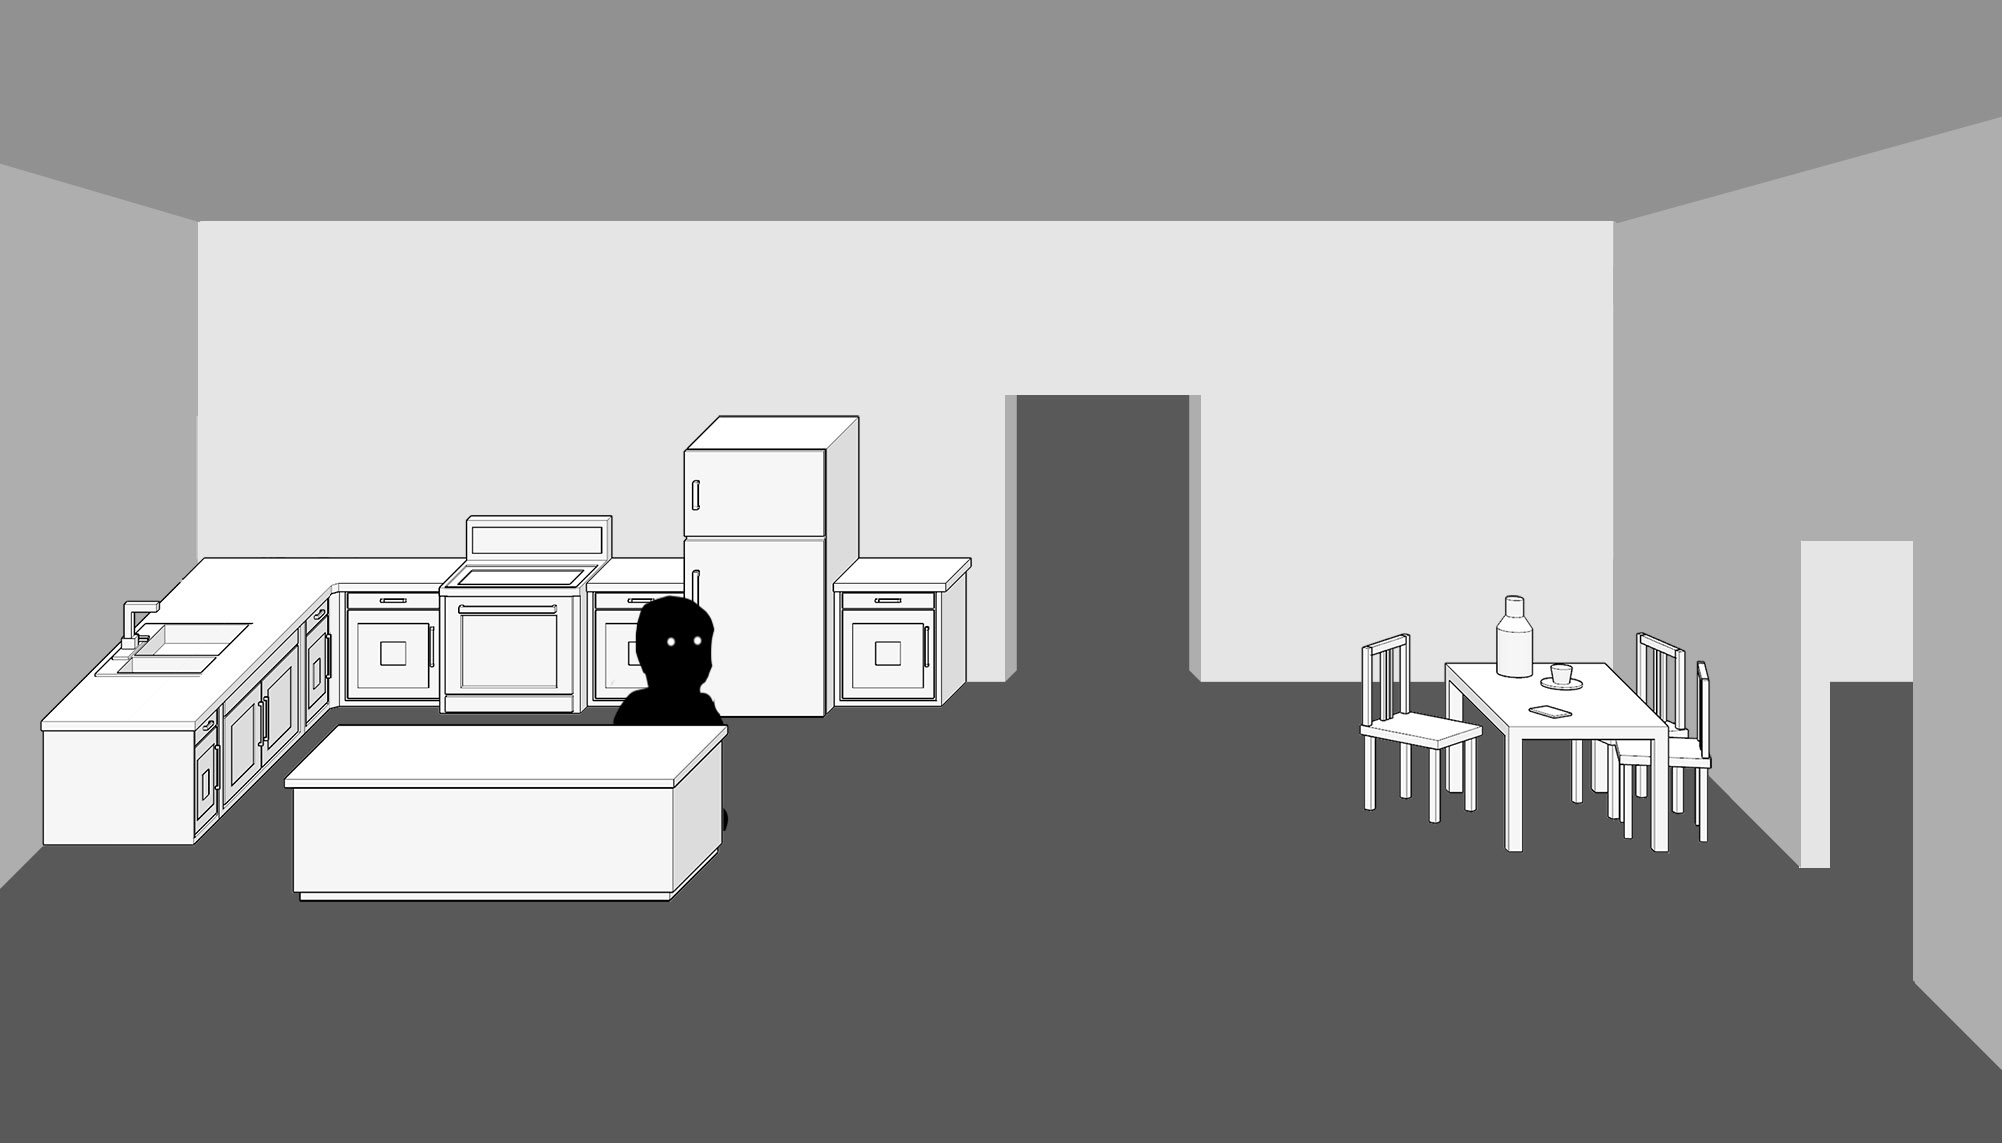
I maybe don’t hate that. Everything on the left points at 45% to the right and vise-versa on the other side. The door is the only item in the room that has both perspectives at once. Here’s a living room test:

I’ve done even more experimenting and using a few rules when I design interiors I’m confident I can make this work. Unfortunately the experiments use even uglier art than these pictures I’m showing (hard to imagine, I know) so I won’t bother showing them here.

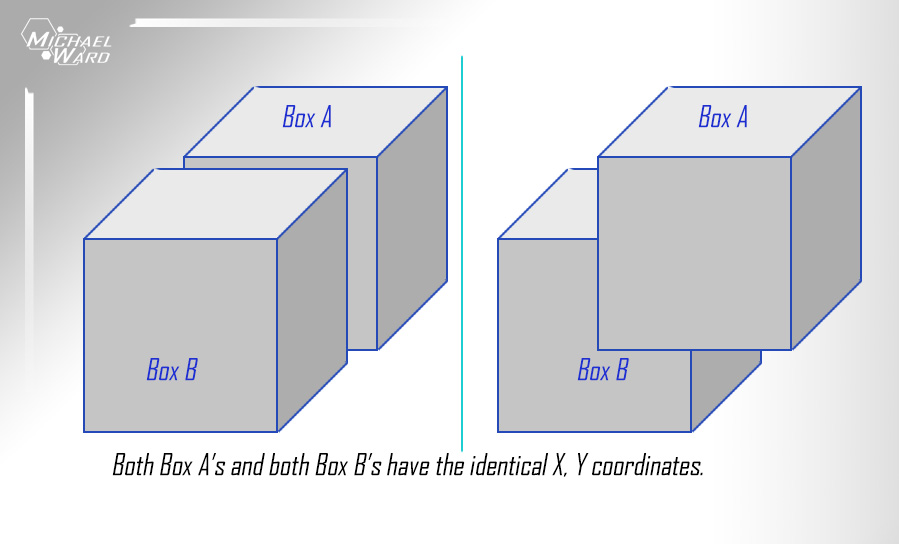
However! This raised a new issue. Remember in devblog #4 when I explained how I programmed the collisions. Well it doesn’t work anymore. I coded it very specifically so that the player collided with a box facing to the right.

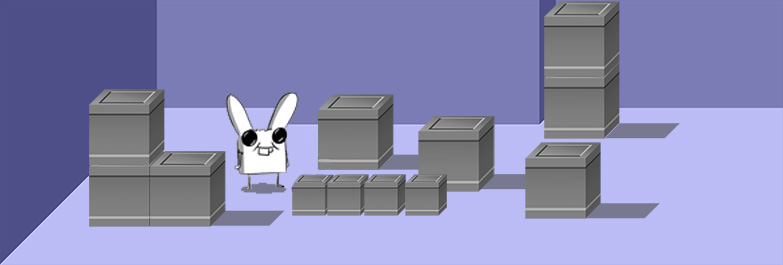
So if I put a box facing to the left on that same “ground plane” there it all breaks. Ugh. And the way I programmed it it’s not an easy fix. Since I effectively have to start over I’m doing it totally different. Instead I’ll set up the room with just sprites and no collisions. Then I’ll make 5 invisible objects that’ll handle all my collisions. I’ll just layer them overtop of the sprites and they’ll stop me from walking into walls. Done! Here’s the concept:

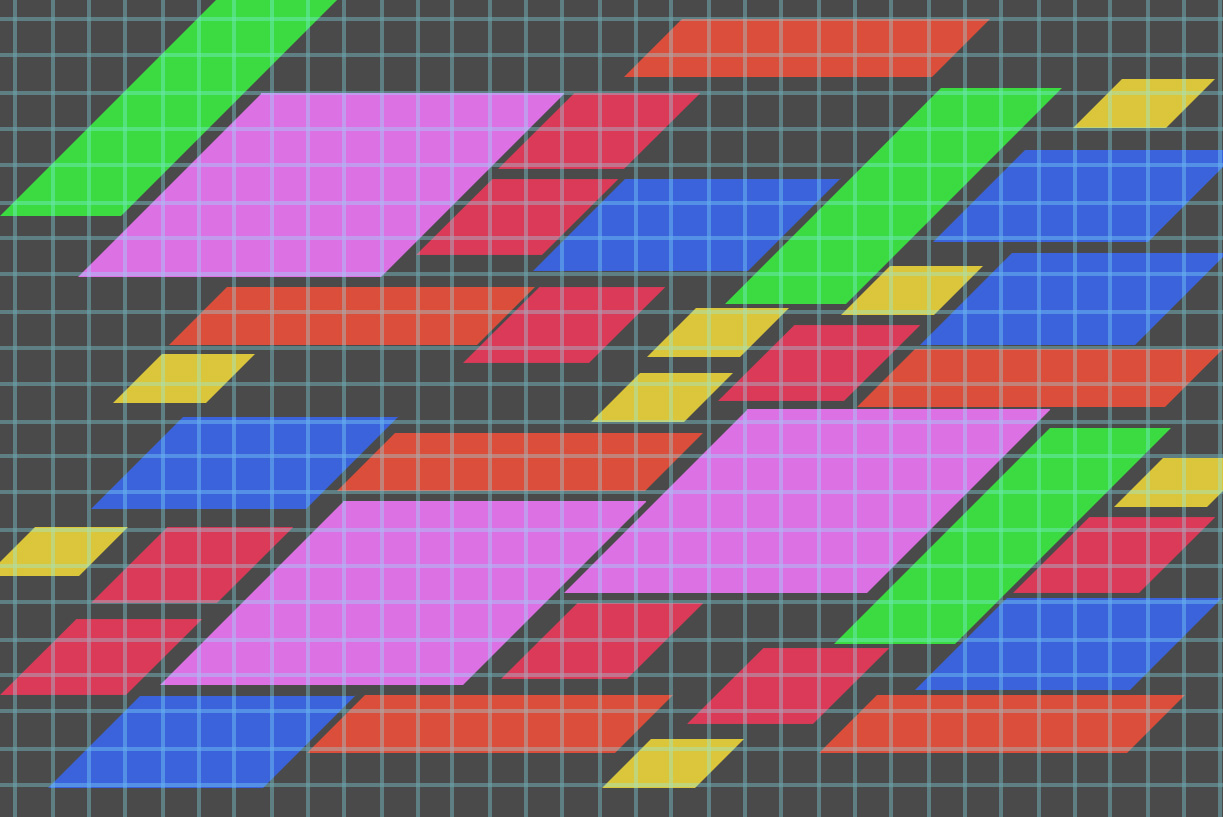
The whole game will be made up of sprites laid out on a square grid using tilemaps. Originally I wasn’t going to use tilemaps but, at least for collisions like these, I appreciate their usefulness. In the actual version those squares will be identical sizes and line up with pixel perfect precision instead of all wobbly like they are there. The red areas are where the character cannot walk.

So when I say I’m starting over I really just mean I’m starting the collisions over. But since that’s literally the only thing programmed into the game so far… well you get it.

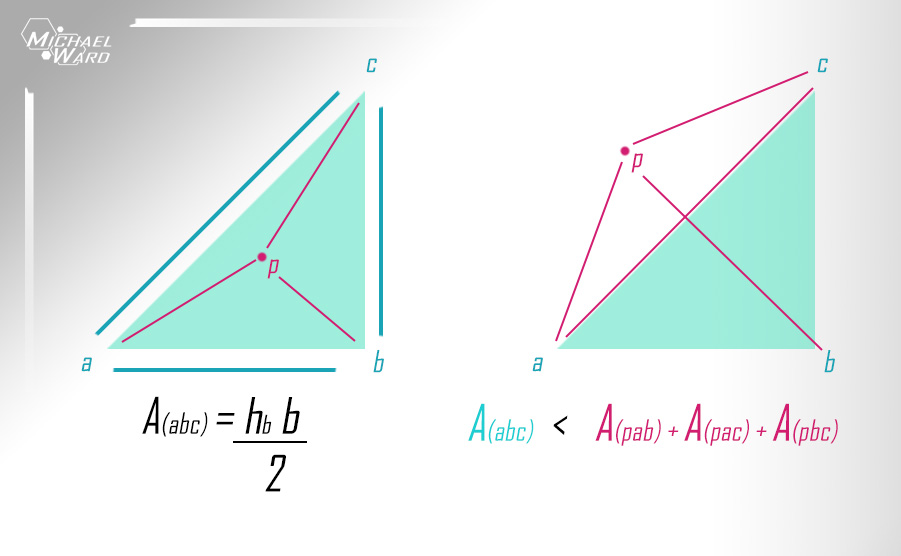
I also just had the benefit of this blog realized to me again. When I originally started to think that I’d need to make these special collision boxes I figured I needed 3. But when I was creating this image which served no purpose other than to explain this blog post better it became obvious that I wasn’t thinking about the triangles properly and I needed 5. And actually there are a few other variations like half blue – half red that I could see being useful but I’m not sure yet if it’s necessary. I’m going to photoshop up a room using actual pixel perfect scale objects AND collisions and see how well it works.

I’m going to bed

Michael

Tools, Tutorials, Videos & Seminars

Devblog numba 5:

This won’t be a crazy super long post this time, Diary. Mostly just an update on what I’ve been up to the last while.

I’ve been crazy hard at work on the game but it sure doesn’t feel like I’m making a lot of progress on it. And in truth I’m not. Yes I’ve done a bit of coding here and there and I’ve done some sketches and notes. But mostly my time has been spent doing TUTORIALS. Tons of them. Basically I’m recreating other peoples games. And I’m sooo glad I started doing this. I’m learning tons of tricks and coding techniques that I never would have figured out on my own. Every 2 hour tutorial I finish is probably saving me 2 days (or more) of work that I would have fumbled through.

Here is a screenshot of the Farm RPG tutorial I’m following. You can see I just got the planting system working.

If you are interesting in learning GML I recommend following the tutorials from Shaun Spalding and FriendlyCosmonaut. Their tutorials are totally free on youtube and crazy simple to follow. And they provide the assets. I also paid for a tutorial on Udemy. It’s like $50 or $200 now but it was $13 on sale. I haven’t followed it yet but it’s time is coming.

If you follow me on twitter, instagram or facebook you would have seen this. The first successful test of my collisions! All that trigonometry and junk I was babbling on about before in action. The character is just a placeholder.

Awesome butt, right?

This shows my idea for the perspective is viable. Truthfully there’s still a bit of an issue when dealing with boxes that are way bigger or smaller than others. I’ve spent hours and hours reading about ways to fix it but it’s just eating up all my time. I’m going to start splitting all assets into same-size boxes to make the depth sorting faster for me. If a long table is actually 2 sprites then so-be-it.

But creating assets is about to get a looot easier. I found a plugin for Sketchup! Sketchup is a marvelous drafting tool for making blueprints and designs for buildings. It’s not “officially” a 3D rendering program but I honestly wish all 3D programs were as easy to use. In about 15 minutes I created a table and chairs to use as a test. The chair legs are totally stupid but since it was a test I opted not to go back to fix them. And then using the Eneroth Axonometric Plugin I was able to convert the table to my Oblique Projection in 30 seconds. I used the settings Left Angle: 0, Left Scale: 1, Right Angle: 45, Right Scale: 0.5 if anyone wants to try it. Here’s how effective it was:

Because the plugin completely destroys the shape of the object to make the perspective work I only get to keep the lineart. No shadows or rendering will work properly. But it’ll still save me a ton of time compared to just doing the entire thing by hand. Especially with round objects. The math to get a cylinder drawn in oblique is tedious. For funsies here’s that same model from another angle after running the plugin.

That’s favourite.

There isn’t a lot else to mention except that two nights ago I went to Press A To Start. It was a networking seminar put on by the Macewan Game Development Club. They had speakers from Bioware, Beamdog, XGen Studios , Infinite Monkeys Entertainment and Serious Labs they answered a ton of questions about breaking into the industry. And more importantly they talked about what the day-to-day life of a gamedev really is. And they were honest. Brutally so. (especially Trent from Beamdog but in a good way).

And after a bunch of indie devs had their games setup to see. It’s surprising the kind of talent that’s in the city around me. I really need to make an effort to go to Game Camp at some point but the timing just really doesn’t work with my schedule. I’ll need to figure something out. Logan, the guy that runs it, was also a speaker there and apparently a teacher as well. it was clear actually. His answers were the most positive and concise.

Of all the games set up the two companies Max Games and Raptagon Studios stood out the most to me. Max Games doesn’t make any games that I would be interested in playing (mobile, moba, strategy, etc) but their art stood out. And Raptagon Studios’s game sounded the most ambitious so I’m definitely keeping an eye on them. Plus they have a tie-in comic and I’m a sucker for comics.

In fact, the other day I was without my sketchbook so I had to doodle a comic on lined paper. Gross.

It’s dumb but got a few retweets so hey whatevs.

This “short” post got really long suddenly so I’mma end this and get back to it.

Michael “How Do I Use A Semicolon” Ward

Trigonometry For Children

Devblog # 4

Dair Deary (spelling?),

The last two weeks have been a real challenge. I had finally moved into actually programming this darn game. Before that it was a lot of notes on paper or sketches/experiments in photoshop. Since I know very little about programming and I’m learning as I go I’m relying a lot on guides and tutorials and a million bookmarks of the engine manual. Unfortunately for me there are not very many tutorials, if any, for creating a 2D oblique perspective game. So I’m combining a lot of tutorials for top-down and isometric games.

Right now I’m racing to a point where I can actually show progress in game. Actual video game stuff. I needed to program how the game runs first. It’s a completely 2D game but it will look 3D(ish). You can walk left and right and away and towards. You can walk in front of objects and behind objects. As a quick visual experiment to make sure my chosen perspective works I drew this:

The rabbit you should recognize from some random comics I’ve drawn. He’s almost certainly not going to be in the game. But you can see my intended goal as far as setting up a scene. In order to make the character walk AROUND the objects but not THROUGH the objects I needed to set up collisions for the ground under the cubes. In order to do that I needed to break down the object and tackle each part separately.

The game engine allows you to create a rectangular “collision mask” for sprites that use very little CPU power. It’s only tracking 4 points in space (the corners of a box). Unfortunately this does not include angles.

I needed to program in a new collision area for every object and I wanted it to be very low cost to the CPU. Fortunately I got lucky because I chose a 45 degree angle for the side perspective. Using the very simple formula for perfect right angle triangles I simply took the side dimension of our collision mask and extended outwards from the top right corner and bottom left corners. This created a new area that I can track.

Now to find out if my character is in fact inside of that area I used the “Point in Triangle” formula. It’s a way of finding out if any given point is inside a triangle by measuring the combined areas it makes. If a point is INSIDE a triangle the area stays the same. If the point is OUTSIDE a triangle the areas get larger. (I’m a math junky and it’s so awesome being able to use these formulas in real life now).

Yes you can use the formula of A = ab / 2 for the first triangle but since you can’t for the other three I didn’t put it in the picture. The silly thing is that I was half way through coding these formulas into the game when I found out that I can use a command literally called “rectangle_in_triangle” which did all the math for me. I just needed to set up the original coordinates of the triangle points and player bounding box. Really saved me a lot of time. Well not really. I had done most of the math already…

There was still one small glitch though. As it turns out the “Rectangle” actually doesn’t trigger when it hits the “triangle”. It only does if one of the corners meets the triangle. Effectively it was doing 4 “point in triangle” calculations.  So to compensate for it I use a “point_in_rectangle” using the furthest point of the triangles and the players bounding box. I’d made a graphic for it but I’m tired and can’t be bothered. If anyone out there ever actually does follow what I’m doing they can ask me to clarify if they don’t already get it.

I spent days. Maybe weeks. working on this. I could recreate it now in a matter of minutes but with only a basic grasp of how to program what I’m thinking the smallest mistake can cost me hours while I try to diagnose the problem. In order to really know I had to finish another issue I had. The depth of objects. When objects or characters move around they need to be shown behind or in front of objects depending on the situation.

I followed an awesome guide from Friendly Cosmonaut to create a grid that will load all objects with a lower Y coordinate first and higher numbers after. This puts them in the correct order going down the screen. This works for most RPG type games like Stardew Valley or Final Fantasy because you don’t see any of the sides of the box.

So close. I went searching for a solution but I wasn’t quickly able to find one. People asked similar questions about how to order all the X coordinates before moving to the next Y coordinate and some of the answers they got were complicated and heavy. For mine I just simply added a ZERO to the end of the Y coordinate for each object and added the X coordinate. So now instead of 15 objects having an identical Y coordinate (ex 1). Then they each get their own like 11, 12, 13 -> (all 15 objects) before moving to the next Y coordinate to find new boxes.

Long story short it worked like a dream. For a few minutes before I found ANOTHER problem. This works great for objects that have the same size footprint. And with a very small modification I made it work for longer items. But items that reach forward and back completely break it. Here’s a grid I created in photoshop with a bunch of different sized and shaped 45 degree parallelograms (the shape my boxes make in the end).

I have dozens of pictures like this from experimenting. It’s ridiculous. If all the objects loaded in the way I needed it to this grid would create a scene like this:

But the largest boxes that extend backwards and forwards the most mess it all up. I haven’t yet come up with a formula that will correct that for me. I’ve had a few experiments come close but nothing perfect. For now I’ll have to just cut up large sprites into multiple objects or tiles so I can continue on with my game. My google searches have just about convinced me that a one-line formula is not likely to fix this. A solution in javascript I found was 200 lines of code and I have no idea how to start using it. I’ll have to come back to it.

But now I’m excited because I can finally start producing assets and show off what this game actually is. I’M SO CLOSE!

Love Michael